


← Back to Part I: Tools and Preparation
Steps 11–17: Beginning the Knotting Process
Knots are formed between each pearl to prevent friction and protect the strand. The goal is evenly spaced, tight, and consistent knots. Consistency here is what gives the necklace its clean, professional look.
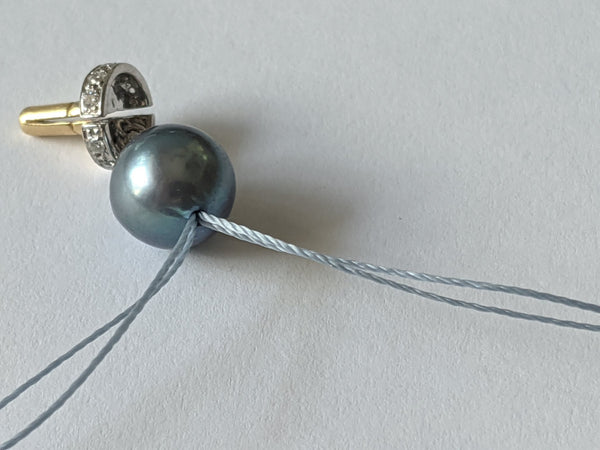
Step 11. First knot formed between the end pearl and the next one

Step 12a. Thread passed through the second pearl, preparing for the next knot

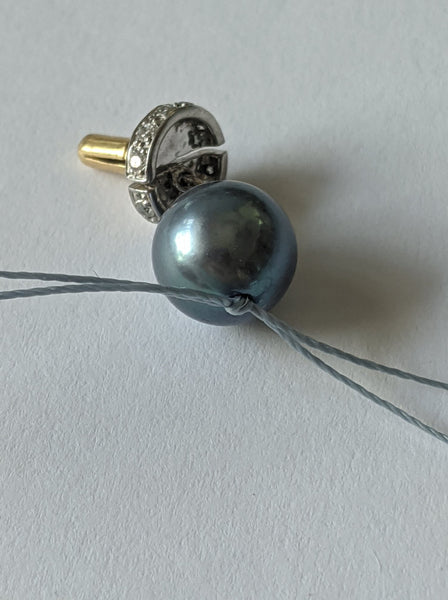
Step 12b. Thread passed through the second pearl — knot formed


Step 13. Thread passed through the third pearl — knot formed

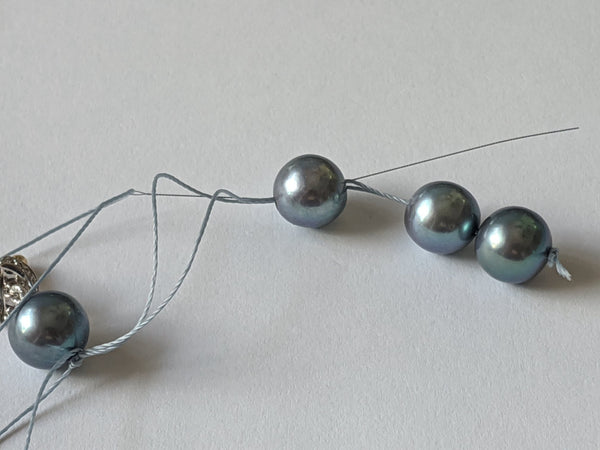
Step 14. Thread passed through the fourth pearl — do not make a knot yet


Step 15. Cut the short tail as close to the pearl as possible. The trick is to hide the cut end inside the pearl for a clean finish. Be careful not to accidentally cut your working thread!

Step 16. Now make a knot after the fourth pearl, looping the thread over your palm to form a loop. This photo was taken after all pearls were strung loosely, without knots — showing how to form a knot on a single thread by looping it over the palm.

Step 17. Make a knot on the single working thread by looping it over your palm. Use the sharp tips of tweezers (or an awl, or a darning needle) to guide the knot directly against the pearl hole. To secure the knot, pull the two threads apart. The knot should be tight — but don't pull with all your might, or you may snap the thread (it happens).

This is what your knot looks like after the fourth pearl — neat and no different from the rest. You won't even need glue to secure it. Glue is just for peace of mind, if you're paranoid for extra reassurance.

Step 18. String all remaining pearls onto the thread — except the last four. This keeps the long working thread from tangling.
Tip for beginners: You can also string 5–10 pearls at a time rather than all at once — knot, then string the next 5–10.

Step 19. Leave the last four pearls aside — these will be strung last.

Step 20. Leave a gap between the knotted pearls and the loose ones — this will become your loop.

Step 21. Slide the fifth pearl up against the knot after the fourth. Make a knot by looping the thread over your palm, forming a loop, and passing the short end of the thread (the one with the end pearls and clasp) through the loop.


Step 22. Use your tweezers to guide the knot precisely into position — directly against the pearl hole. Pull both thread ends apart to tighten the knot.

Step 23. Continue sliding pearls up and making knots. Pay attention not to skip any knot. Take your time — don't rush or you'll tangle the thread.
Patience and calm. Have a glass of wine, for goodness' sake.
Continue until you've tied the very last knot.

Step 24. Now it's time to string the last four pearls, the second piece of French wire, and the second half of the clasp. Simply pass the needle through them without making any knots.

Step 25. Pull all four pearls and the French wire with clasp up snug against the last knot.

Step 26. Pass the needle and thread back through the first pearl from the clasp end, pulling the clasp and French wire into a loop. Take your time — slowly and carefully! Pull the thread tight, with no gaps between the loop and the pearls.

Step 27. Loop the thread and needle over the finished pearl strand, forming a loop between the first and second pearls. Pull the thread tight — no gaps between the pearls!

Step 28. Make a knot.

Step 29. Pass the needle through the hole of the second pearl from the end and pull the thread all the way through, drawing the whole construction tight.

Step 30. Pass the thread between the fourth and fifth pearls — there is already a knot there.

Step 31. No more knots — simply trim the tail carefully so it hides inside the fourth pearl.

This is the tail I had left. It looks like a lot — but you need the reserve in case you have to redo the starting end and cut the thread.

End result.
A Question About Thread Length
A reader sent me a message asking about thread length. I'll answer here for everyone.
"Good afternoon, Marina. Thank you so much for your detailed description of the pearl necklace stringing process! I have a question — I've seen a different method on Facebook that uses much less thread. Why does your method require so much?"
My answer
Here are my arguments for using five times the finished necklace length.
1. Knots consume a lot of thread.
a) Number of knots. The more knots you make, the more thread you need. For any given necklace length (say, a standard 45 cm), a strand of small pearls will have more pearls — and therefore more knots — than a strand of large pearls. So you'll need more thread, not less.
b) Type and size of knots. A jeweler's knot uses more thread than a simple knot. Occasionally I find that some pearls have larger holes than the rest, and a simple knot slips right through. In that case, I tie a jeweler's knot next to that pearl. (To make a jeweler's knot, pass the thread through the loop of a simple knot a second time before tightening.)
2. The tail you trim after the first four pearls takes about 10–15 cm of thread on its own.
3. Maneuvering the needle through the last four pearls becomes much harder if you're working with only a short length of thread left.
4. Thread is cheap — your time is not. It would be a shame to run short, especially if you've had to start over a few times (the clasp end takes some practice!) and already trimmed the tail once.
For all these reasons, I always err on the side of cutting more thread rather than less.
Professionals take "four lengths plus a little extra." But for anyone doing this for the first time (or infrequently), I strongly recommend five lengths.